
Alright, so you're here for one simple fucking reason: you're a retard and you need to learn how to do shit the way real niggaz do. don't worry, I'll hook your ass up and I even put pretty pictures in it like mommy used to read to you as a child. Let's get down to basics: I'm gonna explain everything as if you're some kind of retarded faggot and expect you to know literally nothing - let's get started.
|
|


STOCK CONTROLS MY CONTROLS
The main difference between the two is mostly that we're effectively removing hotkeys for your primary and secondary. The reason being that you will always want to swap to weapon 2 when you have weapon 1, and vice versa. Q is already a quick swap button, which means we can rebind our layout to make 1 and 2 item selection, to minimize your chance to fatfinger the wrong item, as they're all now easier to reach with your left hand. I also swapped V to be the voicechat button but you don't need to do that.
THE BASICS
L4D2 is pretty comparable to most other shooters, for the most part it's a very arcade-y game and VS can be incredibly fast paced. Don't have a panic attack just yet though, as this game is incredibly simple: there's just some key things to understand.
>stay with your team
>you go as fast as the slowest player
>don't be greedy with healing items; share
>communicate with your team
>call out ANY special infected you hear
>TURN THE FUCK AROUND
>every single special infected makes a distinct noise
>your speed is determined by your health
There's a lot more to take away, there are specific interactions that you need to learn, and several knowledge checks per map: however, if you don't intend on reading anything further, this is the most important takeaway. Just cooperate with your team and be sure to listen to your teammates, and ask questions if you aren't sure what the best call is.
SPECIAL INFECTED BREAKDOWN
I lied btw, I'm going to assume you know what most of the special infected do, and only cover the tech surrounding them.
BOOMERThe Boomer pukes, and explodes when killed, hence it's name. If you're hit by the boom, traditionally you're staggered. The puke can be cancelled if shoved at the right moment, and you can cancel the boom's stagger if you're airborne. |
Cancelling the boom 
Fucking up the boom cancel |
SPITTERThe Spitter can shoot acid on the floor (which can be cancelled in the same vein as the boomer shown above). The goo's damage increases the longer the goo's existed. |
Rushing through fresh goo 
raped by old goo |
HUNTERThe Hunter is one of the most dangerous special infected in L4D2, being completely silent until ready to pounce. The hunter can be parried if shoved at the right time. |
GET THE FUCK OUTTA HERE 
oops2 |
JOCKEYThe jockey latches onto survivors and drags them away from the rest of the team. Can be parried if shoved at the right time. |
Daigo vs Justin 
orz |
SMOKERThe Smoker is best when focusing teammates lagging behind. You can shove them to cancel the grab if they're close enough, or simply shoot them if you're quick enough. |

WHACK (shove sfx) 
BOOM (gunshot sfx) |
CHARGERThe Charger specializes in impeding the survivors with massive damage on top of it. They CANNOT be shoved like prior special infected, and can damage any survivors in their path, sending them flying to potentially fatal locations. |
YOU CAN'T SHOVE THE CHARGER. 
two for one special |
WITCHThe witch can instantly down any survivor if angered, which can be done via psychical contact, remaining too close, or shooting her. She's also a health sponge, despite her slender appearance. She can be crowned with a shotgun if every pellet hits her (it may take multiple shots on higher difficulties) |
kwab 
kwab (but directed at me) |
TANKThe tank is exactly as it's namesake implies. It can throw rocks, hits like a truck, and is able to smack cars/other props into the player to instantly kill them. Fire is their direct counter, as molotovs will ignite them, and slowly bleed their health away. (it should be noted that fire-rounds will only temporarily set the tank ablaze) |
BURN BABYYYY (MGS2) 
slathered in antimony trioxide (flame retardant) |
Each special infected has it's own health value, but that's going to just be waffling if I explain it all here, and it's easy to deduce from their designs. As a reminder, every single SI can be heard with distinct sound effects and music. Tell your teammates when grabbed, and tell your teammates when pinned.
SURVIVOR TPS と TRICKS
|
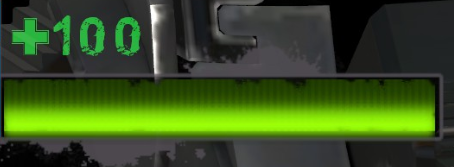
As a survivor, your health is directly influenced by the amount of health you have left, so be sure to keep an eye on it and plan your heals accordingly. When healing, be sure to call it out, and ensure your positioning is in order.
You surprisingly don't want to tuck yourself into a corner, it's much safer to heal right in the middle of the road (as long as your team covers you) as opposed to taking the time to hide in the corner then pull yourself back on track. You should be generally ensuring your space isn't directly next to an insta-kill spot, and that you're typically in front of some sort of platform that'll ensure you won't be yanked away by a smoker (if possible, try and keep away from spots directly under ledges as well) Be smart about your health items, but don't let that scare you away from using using them outright: maintaining full speed is the most important thing for a team. Left 4 Dead 2 allows SIs to spawn on a timer system, so the faster you reach the end, the less chances SIs have to spawn. TL;DR: TALK TO YOUR TEAM AND DON'T DIE. |
 100HP - 40HP | 220HU 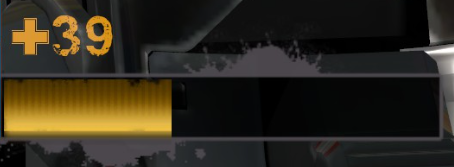 39HP - 2HP | 150HU 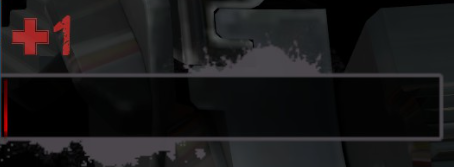 1HP | 85HU |
Here's a compilation of more tips that I'd consider valuable knowledge. They're bullet points because I'd honestly be wasting your fucking time if I tried to turn them all into paragraphs.
|
・the hierarchy for who to save if multiple SIs are pinning teammates is: |
 notice the difference in speed  revive + heal combo  normally you ledge grab and die |
EVERY SINGLE SI CAN BE SHOVED OFF YOUR TEAMMATES*
*except the charger
INFECTED TIPS と TRICKS
Most previous tips apply just as much to the SI team. Generally just attack with your team, and ask your team if you aren't aware
of any setups. Communication is VITAL to success.
This segment won't include any images, as most of these concepts
don't really need them.I might pretty this up later but I think it's fine as is, and most of this is self-explanatory / self-evident.
MINDLESSLY THROWING YOURSELF AT SURVIVORS OVER AND OVER WILL THROW THE GAME!
・The Hunter can bounce off walls and ceilings, doing so also gives him an instant recharge on his pounce, assuming CTRL is still held.
・The Hunter does more damage the further distance he travels when pouncing (NOT the longer he's in the air).
・Spitter goo can destroy and light gas cans during salvage segments of campaigns (when survivors need to fill machinery with gasoline).
・A Charger pummeling a survivor is freed if staggered by a boom, and his meter is recharged. This can lead to rare, but very effective setplay.
・when The Charger grabs a survivor, he can slam into more survivors to send the others flying, which can lead to very dirty
insta-kills
・The Smoker's tongue recharges instantly when broken too early.
・Typically, The Boomer goes first when starting a wave of attacks, as he blinds survivors, and can seperate groups with his blast.
・There are multiple points in most maps that are points of no return (or, "drop-offs"). Survivors won't be able to go back and rescue survivors who get pinned before reaching them. Be sure to try and snag players at these moments for what's basically an
insta-kill.
・Tanks will absolutely die when blindly running into fights. Rely on your team to create openings, and be sure to help your tank by creating those openings. Tanks should also be sure to prevent the survivors from passing it, as the tank has a hard time catching up.
・When the boomer attacks, be sure to focus on survivors that ARE NOT BILED. Attacking a defenseless survivor accomplishes nothing when the completely able teammate next to him instantly kills you.
・While preparing to spawn, you can get a running start and jump right after spawning in to preserve momentum and fling yourself toward the survivors, which is very useful as some of the more fragile classes
・You can claw sitting witches as infected to aggro them when survivors are nearby (or when she's generally getting pissed off).
・Any infected can return to spawning move if you make enough distance between you and the surviving team.
・While in preparing to spawn in, you can press "E" to warp to the nearest survivor.
/V/AN ONLY CHANGES
This is a list of every change that applies to Polarmanne's L4D2 server for /v/an lobbies. Study these; you'll fucking die otherwise and we'll all point and laugh at you lol
>The Jockey can now jump while latched onto survivors.
>Survivors grabbed by The Jockey can no longer struggle; The Jockey has full control.
>The Jockey can deal pounce damage if landing on a target from high enough.
>The Charger can now jump and turn (even mid-air).
>The Charger can slam into survivors infinite times (In vanilla, hitting a survivor twice stops your charge).
>The Smoker can now move while ensaring a target.
>The Smoker's tongue now has near-infinite range.
>The Smoker's tongue now reaches his target almost instantly.
>The smoker's tongue snaps if he climbs/falls any height (vanilla but made noticable via changes)
>The Boomer can now move while puking.
>The Spitter can now move while spitting.
>The Boomer/Spitter can't puke mid-air, but will continue to shoot their projectile if jumping after launch.
>The Tank gets a slight speed boost when ignighted (slightly faster than full-speed survivor).
>The Tank can move (receives a speed increase) while throwing rocks.
>Survivors can now pass pills/addren by pressing "R" (useful if your shove is on cooldown).
>Survivors can press "E" on ladders to stop moving and use weapons.
>Survivors can crawl while incapped.
>The Hunter's pounce damage is now uncapped.
>CSS weapons are disabled (usually).
>All infected can fly by holding "R" while preparing to spawn in.
Now get your ass in the lobby, we need a warrior!

all images taken from personal gameplay recorded by decapitatedDog, or sourced from violencedistrict.club
top image credit: deet